
Here is my second, and last, installation of photography tips. Normal blogging will resume shortly. Today we'll talk a little about light. Right down to the core, photography is all about light. You've got some sort of contraption that holds either real or digitized film that when exposed to light, creates a photograph. You can even make a basic camera by poking a hole in a box. A huge part of photography is assessing conditions and controlling how much and low long your film is exposed to light (again, not an expert...just attempting to go off of my meager understanding and explain).
That late-afternoon, golden light will make any photograph look brilliant. But unfortunately some of life's most photo-worthy happenings take place on cloudy days, or worse, indoors in poorly, unnaturally lit rooms. At one point I was so frustrated that I vowed to only take pictures outdoors between the hours of 7 and 9 am and 4 and 6 pm, but that really didn't get me very far. I hate using flashes, so I avoid that last-resort at all times. But here are some tools that, with the right understanding, will slowly but surely help you adjust to most lighting situations. I'll start with the ones that most cameras allow users to control, and end with the manual functions. This will be incredibly brief and shallow, but it's a starting point for people who want to learn more. There is hope for blurry and orange photos!
ISO: (or film speed) I don't know what this stands for, and who really cares? What you need to
 know is that the higher the number, the more sensitive to light. Bump it up to 1600 and taking pictures indoors is much more feasible. The film will not need as much light to expose so you can take pictures at a quicker shutter speed a.k.a less blur. At noon outside, you'll get the most detail and contrast at 100. And experiment with everything in between. But beware...the higher the number, the grainier the image (which I think can be endearing sometimes).
White Balance: White balance is basically an adjustment that helps colors stay natural looking in all different lighting situations. In most digital cameras this function gives you options for sunny, cloudy, florescent, tungsten, etc. It's fun to play around with and will make your colors look better. The most practical advice for this one is, if you're shooting indoors and people are looking slightly orange...switch your WB setting to tungsten. But if you move outside and notice things looking slightly blue...you know you left it on.
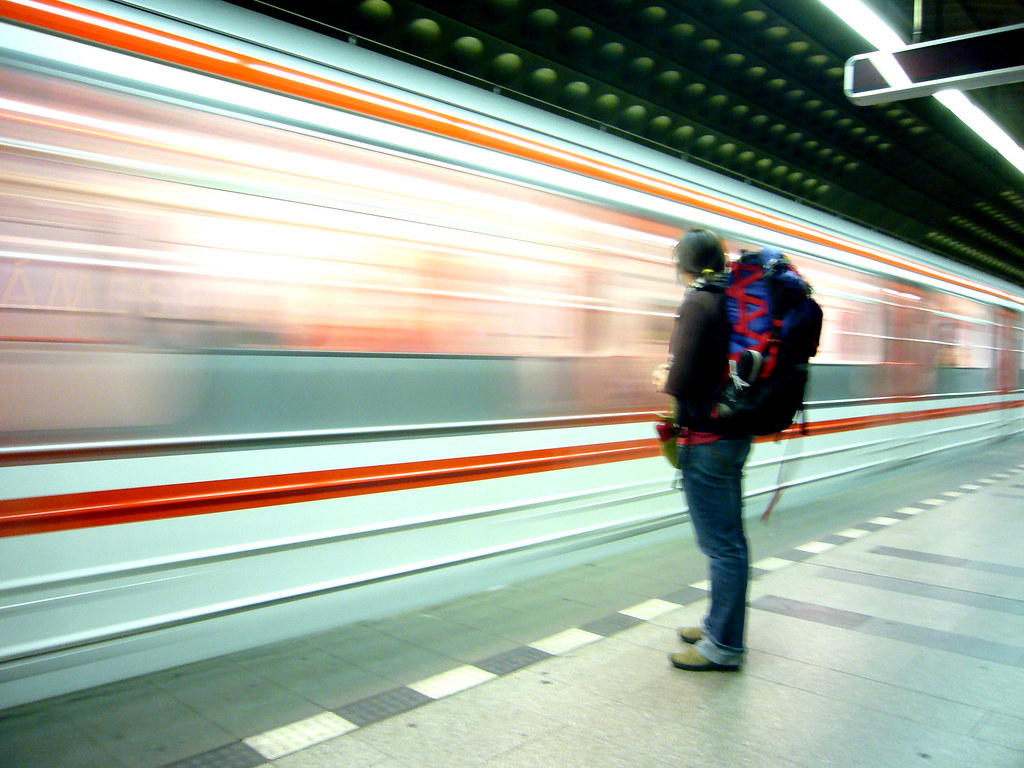
Shutter Speed: Shutter speed deals with how long the shutter stays open (I won't get into the technical suff, but on your camera's setting, the bigger the number, the faster the shutter speed (until you get to into seconds). You'll need something above about 30 to shoot without a tripod and avoid blur. When the shutter is open for a longer amount of time, more light comes in, but this also means that there is a better chance that whatever you're shooting will move while the shutter is open, or the camera will be unsteady and the picture will come out blurry. A faster shutter speed lets in less light, so you need adequate lighting, but it is quick enough to freeze moving objects. If you have manual settings on your camera, you can play with shutter speed to produce some fun effects such as the picture shown above of me in a subway in Prague (taken with a slow shutter speed).
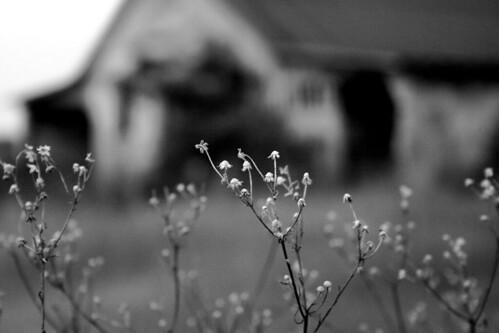 Aperture: Aperture also deals with how much light the camera lets in, but this time instead of controlling how long the shutter is open, it controls how big of a hole the light comes in through when the shutter clicks. Obviously a smaller hole=less light. The number system with aperture is a little tricky at first, but just remember that a smaller number=bigger hole. Aperture is also really cool because it deals with focus too. Pictures where the subject is in sharp focus and the rest of the picture is blurred (called Aperture also deals with how much a shallow depth of field) are taken with a wide aperture (smaller number). Think about it this way: Our eyes are a much more sophisticated version of a camera. We can focus on things in the foreground or background, and subconsciously blur whatever we're not looking at. But what do you do when you want to see something far in the distance? Squint. This is a great way to remember, and visualize, that for landscapes and pictures where you want everything in focus, you need a smaller aperture (bigger number.)
This looks like a pretty good website for more photography tips, if you're interested.
And my favorite photography book, because it is interesting, unique, and has a lot of practical and creative advice with lots of pictures is The A-Z of Creative Photography.
In other news: We had a really fun and active weekend that included our favorite neighborhood restaurant, supporting friends in the local music scene, playing soccer with Mexicans, making pizza, studying for the GRE, hiking at the soon to be Red Mountain Park, and our church that we love.
No comments:
Post a Comment